
- Published on
Waspr Project - Printing Galvos
Lets try again, better prepared
- Authors
- Name
- Mr. Goferito
- @Mastodon


January 27 - Printing galvos
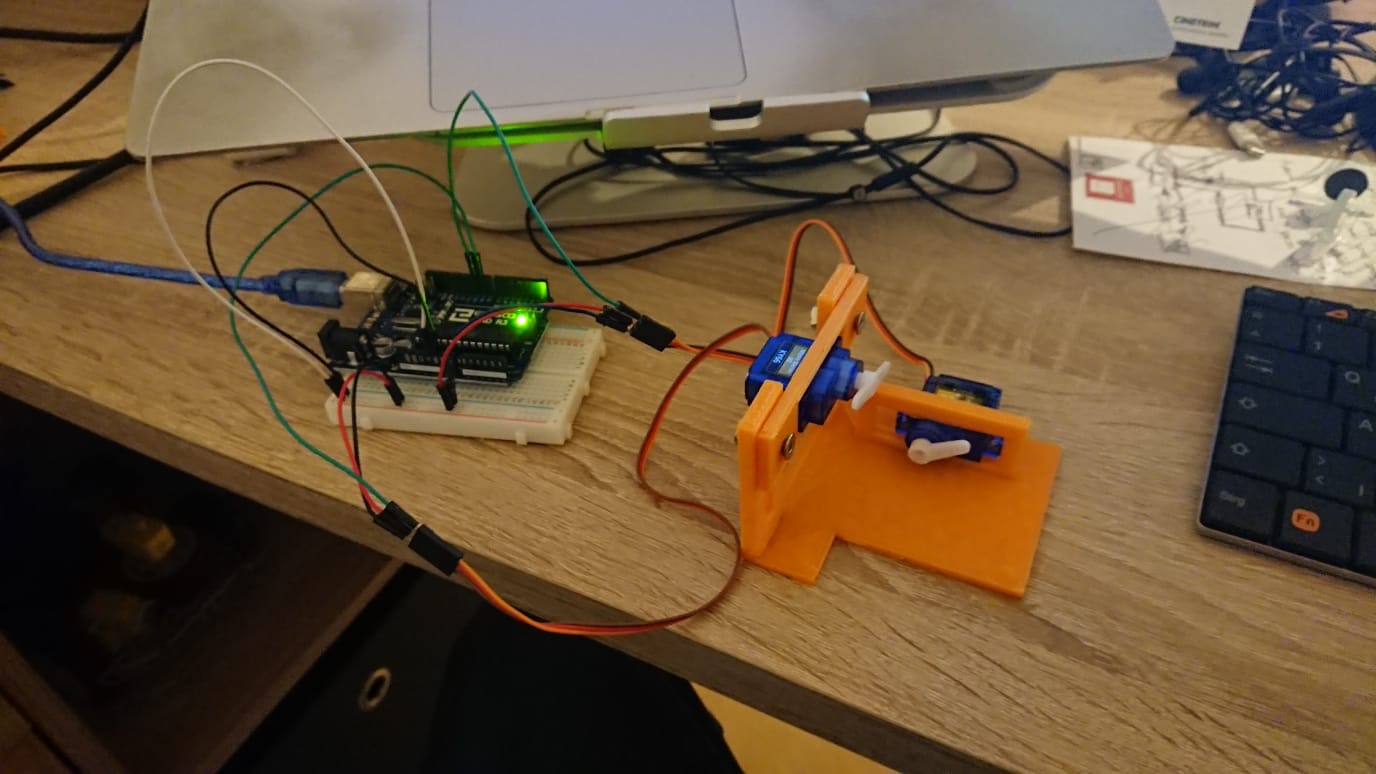
Now that I have checked that I can design and print parts, it is time to design and print the galvanometer parts. It is important that once printed, and everything is assembled, the mirrors get perfectly aligned with the laser beam. Since I don't know how precise the printing is going to be, I design the parts in a way that I can adjust the motor positions at any time.
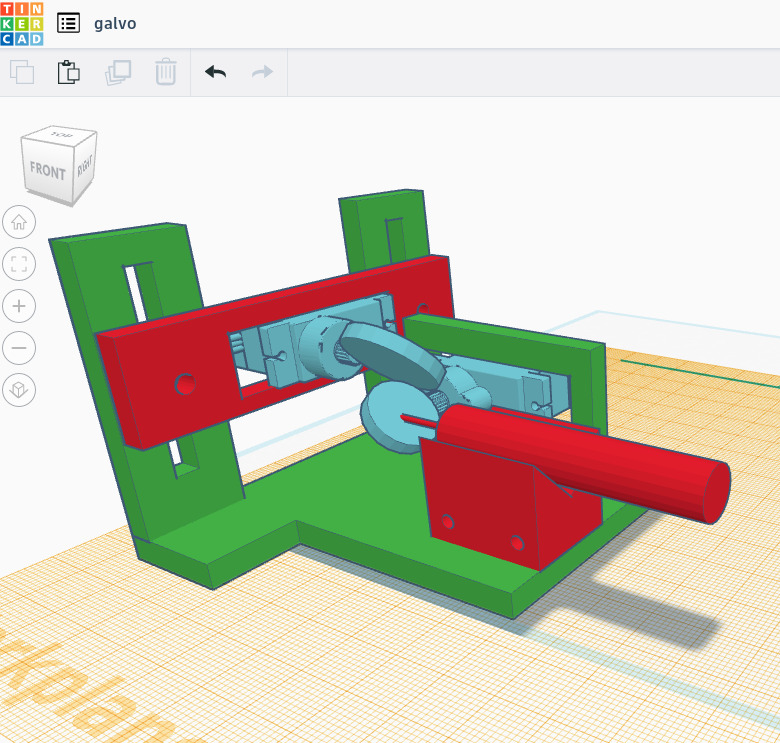
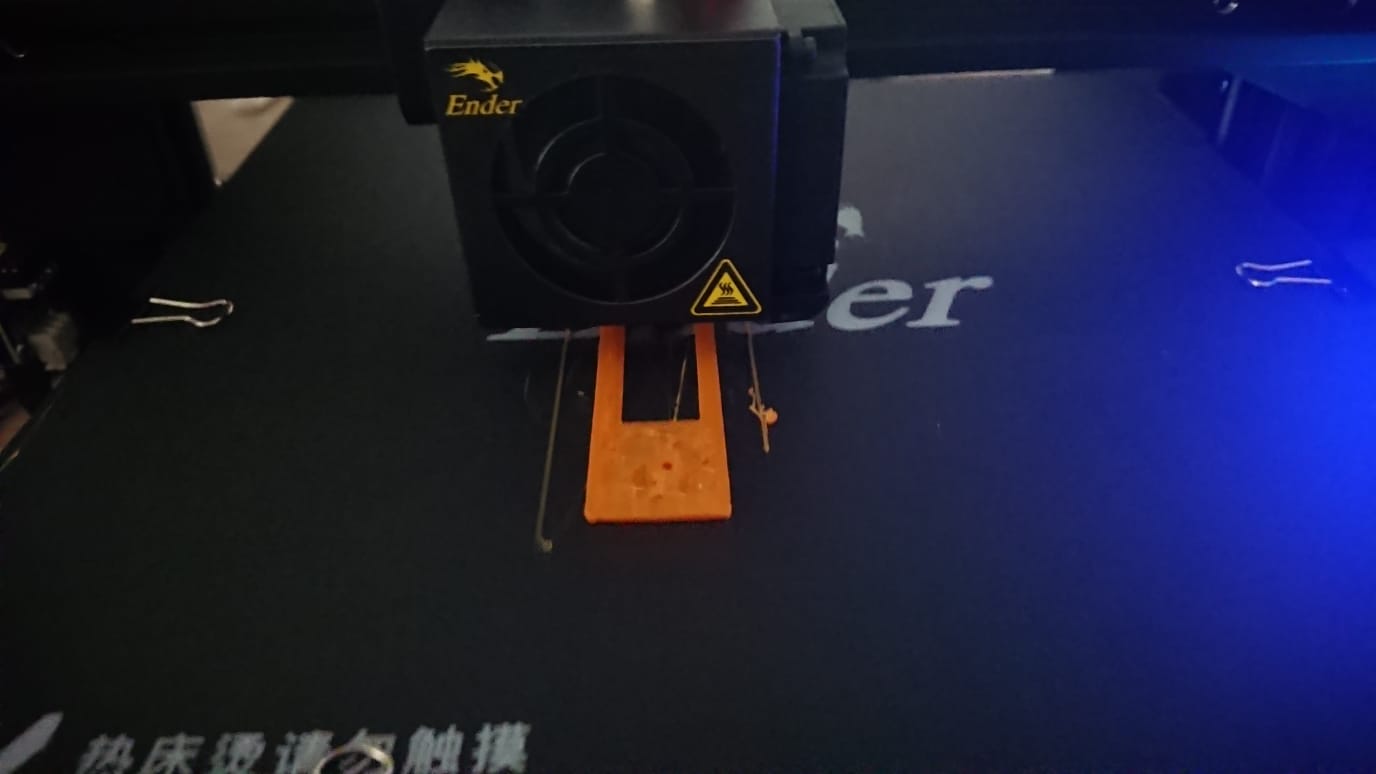
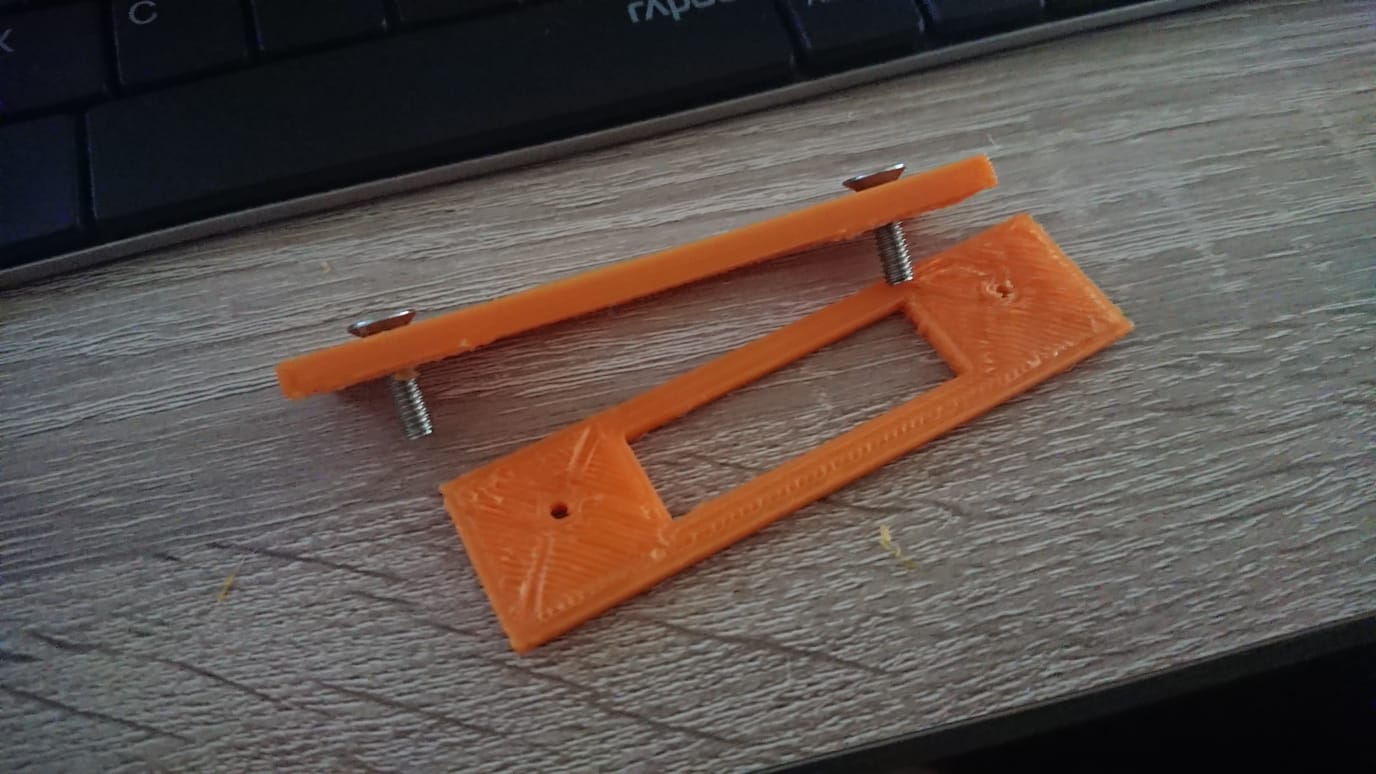
I print the moving part of the galvanometer's structure and the first thing I see is that screws don't fit. For some reason the holes are smaller in the print than in the design. I change the design making the holes a bit bigger. I print again.
Alles gut. Now I print the base. Printing this part will need one and a half hours and around 10 meters of filament.
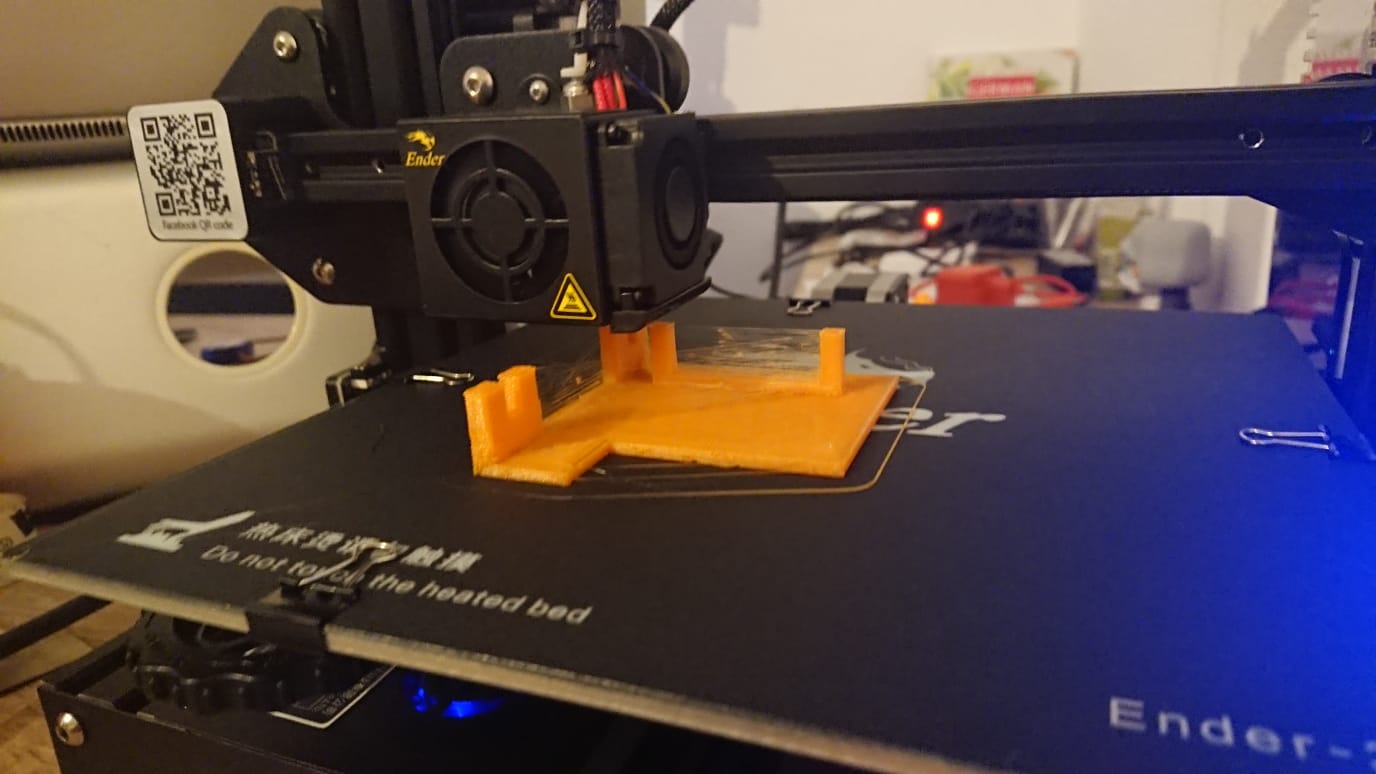
It looks pretty good. And it seems that with half a centimetre thickness is also rigid enough. There are only a few threads left in some parts. I cut the threads with one of the tools that came in the printer box. In the end it seems the pack was quite generous. It also included another awesome tool to remove the pieces from the printer bed.
I screw the moving part to the base and place the motors connected to the arduino. Everything seems to fit well.
I attach the mirrors to the motors with some wires and a bit of glue. I put another wire around a laser pointer, which I bought in saturn for 5 euros, to keep it on. I align the laser with the mirrors. The laser is projected onto the wall. So far everything looks just fine.
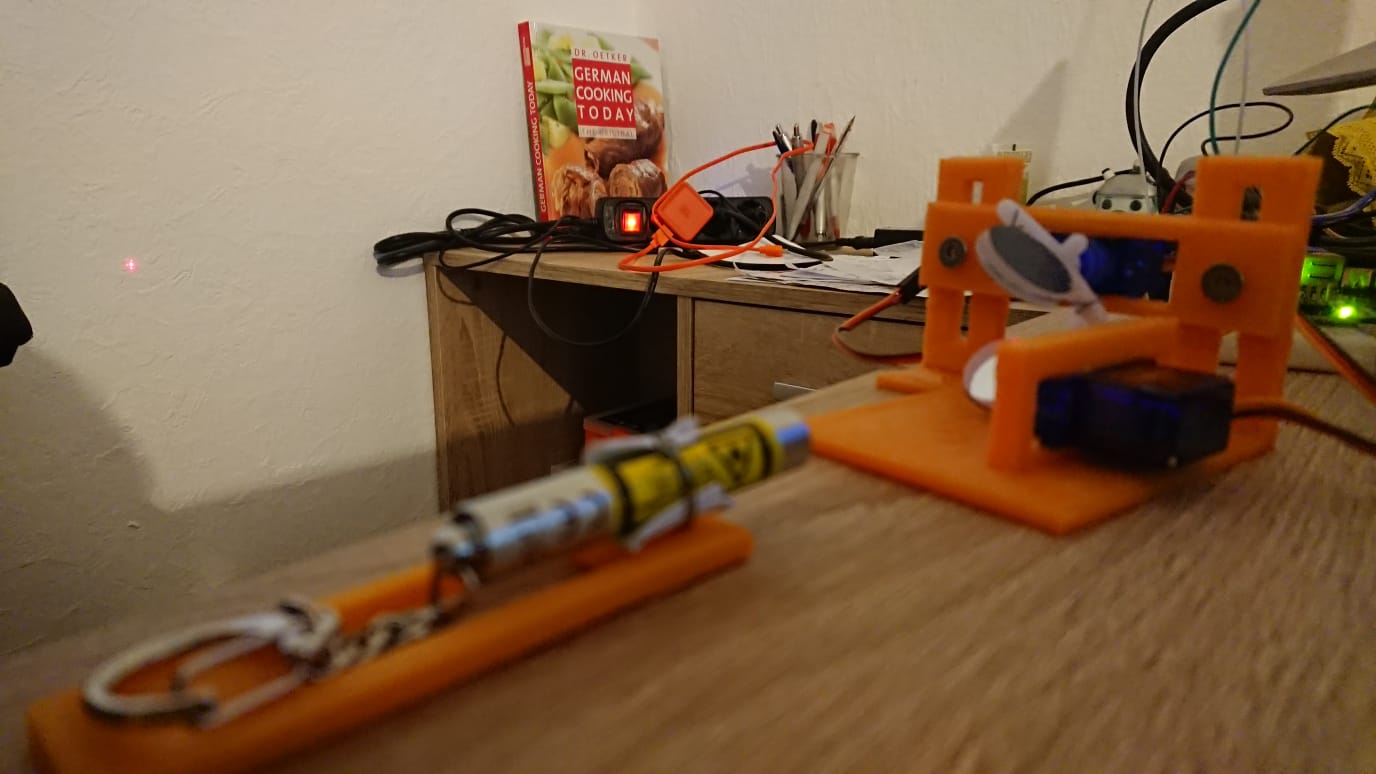
It's the moment of truth. Time to put the program in the arduino that moves the motors and thus direct the pointer in a controlled way.
After a couple of tests and errors: